Using Auto FTP Manager
This section explains how to perform basic operations like adding or editing different types of profiles.

-
Adding a Profile: The first step to is to add a profile. Auto FTP Manager helps you to work with both Quick Connect Profiles and Automated Profiles. There are a few ways to add a profile:
-
From File Menu, click on New Connection Profile.
-
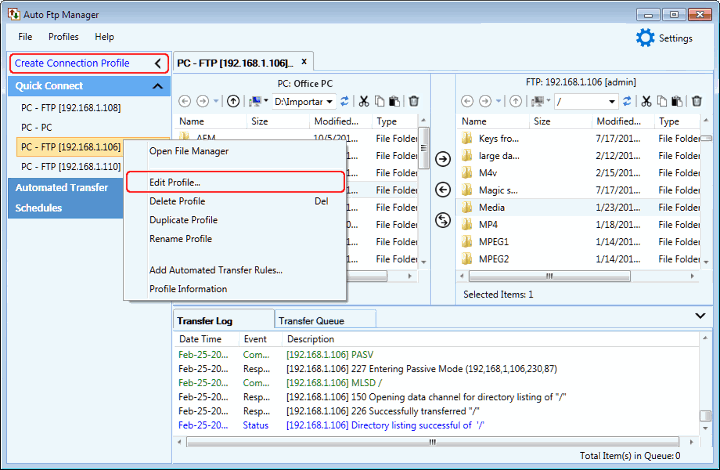
On Connection Profile Panel, click Create Connection profile or click on the '+' button when the Conection Profile Panel is Collapsed.
-
Use shortcut key Ctrl + N.
-
-
Editing Profile: To update the connection settings, select Edit Profile. Here are the different ways to edit a profile:
-
On Connection Profile Panel, right click on Quick Connnect Profile or Automated Profile and select Edit Profile.
-
From Profiles Menu, click on Edit Profile.
-
From Profile Information page, click on Edit profile properties.
-
On File Managers Tab, right click on Quick Connnect Profile or Automated Profile and select Edit Profile.
-
-
Automated Profile: Set Auto FTP Manager to transfer automatically using this type of profile.
-
Automated Transfer rules: Transfer files, Synchronize or delete the files by adding Conflict Resolution rules.
-
Add Filters: Choose the type of files that needs to be selected for transfer in Automated Profiles or Schedule.
-
Scheduled Profiles: Schedule the profile to begin the transfer at specified time.
-
Import Profiles:Import the connection Settings from the older version of Auto FTP Manager .
-
Export Profiles: Take the backup of the Profiles with the respective settings.
-
Command line interface: Interact with the application by issuing the commands in the Windows Command line.
